Essential Oil Roller Bottle Blends: 5 Recipes to Make
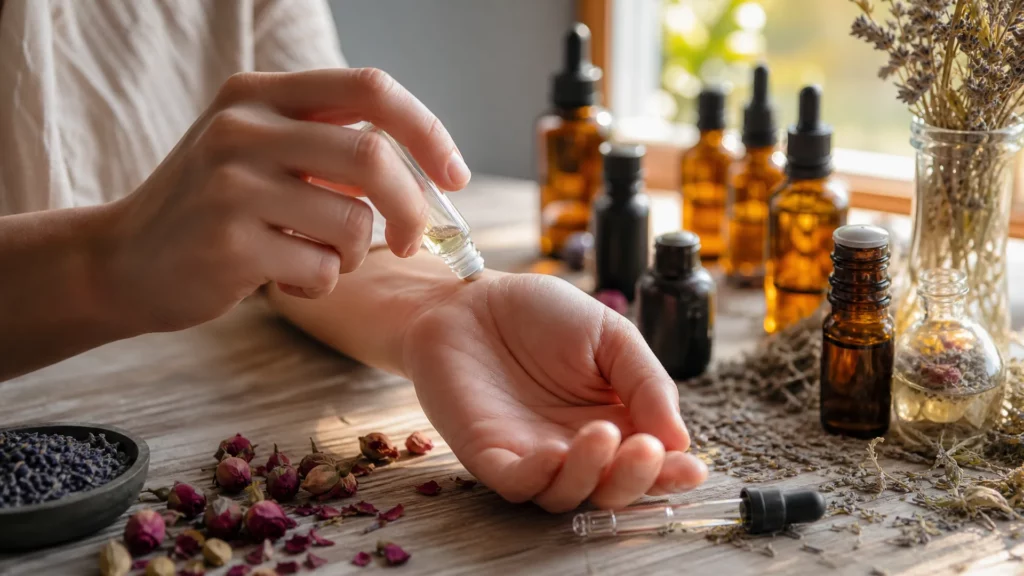
Essential oil roller bottle blends are one of the simplest ways to bring aromatherapy into your daily routine. You get precise, mess-free application, a portable format that fits in any pocket or handbag, and results you can feel confident about, because you made it yourself. In 2026, more South African makers are turning to DIY wellness and natural perfumery to control exactly what goes onto their skin, and roller blends are the perfect starting point.
Why Roller Bottles Are the Easiest Way to Use Essential Oils
Roller bottles remove almost every barrier to using essential oils. There’s no dropper to fumble with, no diffuser to set up, and no mess on your hands. You roll directly onto pulse points, breathe it in, and get on with your day.
They’re also beginner-proof in the best way. Once you’ve mixed your blend, it’s ready to use repeatedly with zero extra effort. For anyone exploring natural perfumery or DIY stress relief rollers for the first time, a 10 ml roller is the ideal canvas, affordable, reusable, and endlessly customisable.
Essential Oil Roller Percentages: Getting Your Dilution Right
Dilution is the one number worth understanding before you make anything. Essential oils are concentrated plant extracts, effective in small amounts and potentially irritating when used neat. The maths is simple once you anchor it to a real bottle size.
A standard 10 ml roller bottle holds roughly 200–220 drops of liquid. At that volume, 4 drops of essential oil gives you approximately a 2% dilution, the widely recommended starting point for adult body blends. Keep that figure in mind as you work through the recipes below.
General Essential Oil dilution guide by use
| Application | Dilution | Approx. drops per 10 ml |
|---|---|---|
| Face & sensitive skin | 1% | 2 drops |
| Body blends | 2% | 4 drops |
| Spot treatment / natural perfume | 3–5% | 6–10 drops |
For children under 10, dilutions of 0.5–1% are safer, that’s 1–2 drops per 10 ml. During pregnancy, stick to 1% or lower and check individual oil safety first, as some essential oils are contraindicated.
Why going too strong is a common beginner mistake
It’s tempting to add more drops thinking a stronger blend will work better. It usually doesn’t. Professional aromatherapy guidance consistently recommends starting at 1–2% and only increasing once you understand how your skin responds. A well-diluted blend is still effective, and it’s far less likely to cause sensitisation, a reaction that, once triggered, can make you reactive to that oil permanently.
Start low, patch-test on your inner arm, and work up from there.
Choosing the Best Carrier Oil for Roller Blends
The carrier oil makes up most of your roller blend, so choosing a good one matters. For roller blends specifically, you want something lightweight, non-greasy, and stable enough to last a few weeks without turning rancid. Here are three solid options to consider when shopping for carrier oils for roller blends.
Jojoba oil is the go-to for roller blends. It’s technically a liquid wax rather than an oil, which means it resists rancidity far longer than most carrier oils, ideal for a blend you’ll keep in your handbag for weeks. It’s also non-greasy and absorbs cleanly into skin. Read more about why jojoba makes such a great roller base if you want the full picture.
Fractionated coconut oil is another excellent choice, light, odourless, and very affordable. Because it’s been processed to remove the solid fats, it stays liquid at room temperature and won’t compete with your essential oil fragrance. It’s the carrier used in several of the recipes below.
Sweet almond oil is slightly heavier but gives a lovely slip on skin. It’s a good all-rounder for body blends and is widely available at a lower price point than jojoba.
Whichever carrier you choose, consider adding a small amount of vitamin E oil, typically a few drops per 10 ml. It acts as a natural antioxidant and helps slow oxidation. See our guide on adding vitamin E to extend shelf life for more detail on how to use it.
5 Roller Bottle Blend Recipes to Make Right Now
All recipes below are for a 10 ml glass roller bottle. Add your essential oils first, then top up with carrier oil, cap, and roll gently to combine.
DIY stress relief roller
A DIY stress relief roller is one of the most popular first blends, and this one is beautifully simple. Lavender, frankincense, and bergamot blend well together without any advanced knowledge, and all three are widely available.
- 2 drops lavender essential oil
- 1 drop frankincense essential oil
- 1 drop bergamot essential oil
- Top up with jojoba oil
- Dilution: ~2%
Usage tip: Roll onto wrists and the back of the neck at any point in the day when you need to reset.
Sleep support roller
Calm, grounding, and slightly sweet, this blend is designed for the 30 minutes before bed.
- 2 drops lavender essential oil
- 2 drops cedarwood essential oil
- 1 drop vetiver essential oil
- Top up with fractionated coconut oil
- Dilution: ~2.5%
Usage tip: Apply to the soles of your feet and pulse points just before you get into bed.
Natural perfume roller blend
Natural perfume roller blends work on a simple top-middle-base structure. This one is fresh, warm, and genuinely wearable.
- 2 drops bergamot essential oil (top note)
- 2 drops ylang ylang essential oil (middle note)
- 2 drops sandalwood essential oil (base note)
- Top up with jojoba oil
- Dilution: ~3%
Usage tip: Apply to pulse points, wrists, collarbone, behind the ears. Reapply as needed throughout the day.
Focus & clarity roller
Clean and sharp, built for work, study, or any time you need your brain to catch up with your to-do list.
- 2 drops peppermint essential oil
- 2 drops rosemary essential oil
- 1 drop lemon essential oil
- Top up with fractionated coconut oil
- Dilution: ~2.5%
Usage tip: Roll onto your temples and the back of your neck before a work session. Avoid the eye area with peppermint-containing blends.
Muscle ease roller
This one earns its place in a gym bag. Higher dilution because it’s a targeted spot treatment.
- 3 drops eucalyptus essential oil
- 2 drops peppermint essential oil
- 2 drops black pepper essential oil
- Top up with sweet almond oil
- Dilution: ~3.5%
Usage tip: Roll onto tired or sore muscles after exercise, then massage in gently. Not for use on broken skin.
How to Make Roller Blends: Step-by-Step
Making essential oil roller bottle blends requires no specialist equipment. If you have a roller bottle, essential oils, and a carrier oil, you’re ready.
- Gather your supplies. You need your roller bottle, the essential oils in your recipe, your carrier oil, and a small funnel or pipette if helpful.
- Add your essential oils first. Drop them directly into the empty roller bottle. Doing this before the carrier oil means they disperse more evenly.
- Top up with carrier oil. Fill the bottle almost to the neck, leave just enough space for the roller ball insert.
- Press in the roller ball and cap firmly. Give the bottle a gentle roll between your palms to combine everything. Don’t shake, rolling is enough.
- Label immediately. Write the blend name, date made, and ingredients on a label. This matters both for personal use and especially if you’re giving blends as gifts.
That’s genuinely it. If you can follow a recipe, you can make a roller blend. For a broader foundation in DIY product making, the beginner’s guide to skincare formulation is worth a read once you’ve got a few rollers under your belt.
Filling and Labelling Your Roller Bottles Like a Pro
Glass is the right material for essential oil rollers, essential oils can degrade plastic over time, especially at higher dilutions. At DIY Naturally, we stock both 5 ml and 10 ml glass roller bottles. The 10 ml size suits most of the recipes above and gives you enough product to use daily for two to four weeks. The 5 ml size is ideal for perfume rollers or when you want to make a smaller trial batch.
Roller ball types vary: stainless steel is durable and gives a smooth roll, while plastic inserts work fine for shorter-term use. For anything you’re selling or gifting, a glass bottle with a stainless steel roller is the professional choice.
If you’re making blends to sell, even small batch, labelling is not optional. Include the product name, all ingredients (INCI names for cosmetic compliance), batch number, date of manufacture, and any relevant warnings such as “not for use during pregnancy” or “keep out of reach of children.” For personal use, a handwritten label with the name, date, and dilution percentage is all you need.
Ready to mix your first blend? Browse our range of glass roller bottles, pick up your carrier oils for roller blends, and source everything you need including roller bottle lables, to make these recipes in one place at diynaturally.co.za. No need to shop across multiple suppliers, we stock the bottles, the carriers, and the essential oils to get you started today.
Disclaimer: All recipes and formulas are shared in good faith. DIY Naturally is not liable for any adverse reactions. Always perform a patch test before use, and substitute ingredients if you have known allergies. Use at your own discretion.