Kaolin Clay, Choose the Right One for Your Skin & 2 Free DIY Face Mask Recipes
Kaolin clay is one of those ingredients that earns its place in almost every DIY skincare kit, and for good reason. It’s gentle, widely available, and forgiving enough for beginners to work with confidently. Whether you’re making your very first face mask or expanding an established routine, understanding the differences between pink kaolin, green kaolin, and red kaolin helps you choose the right clay for your skin type and get real results from your formulations.
What Is Kaolin Clay and Why Makers Love It
Kaolin is a naturally occurring, fine-particle white clay mineral, also known as China clay. It forms through the weathering of aluminium silicate minerals and has been used in cosmetics for well over a century. Its appeal in DIY skincare comes down to a few practical qualities: mild cleansing action, a gentle ability to absorb excess oil and impurities, and a fine texture that blends easily into smooth, spreadable masks.
Cosmetic formulators consistently recommend kaolin as the gentlest entry-point clay because its fine particle size and lower oil-absorption rate make it far less likely to over-strip the skin barrier compared to fuller’s earth or bentonite clays. That makes it a smart starting point if you’re new to clay masks or have skin that doesn’t respond well to more aggressive ingredients.
If you’re just getting started with at-home formulating, a beginner’s guide to skincare formulation will give you a solid foundation before you dive into recipes.
How kaolin clay differs from other cosmetic clays
Bentonite and fuller’s earth are the heavy hitters of the clay world, high oil absorption, strong drawing action, and a real risk of over-drying sensitive skin. Kaolin sits at the gentler end of the spectrum. It still draws out impurities and softens the skin, but without the tight, dry feeling that stronger clays can leave behind. That’s why it works well on dry, sensitive, and combination skin types, not just oily skin.
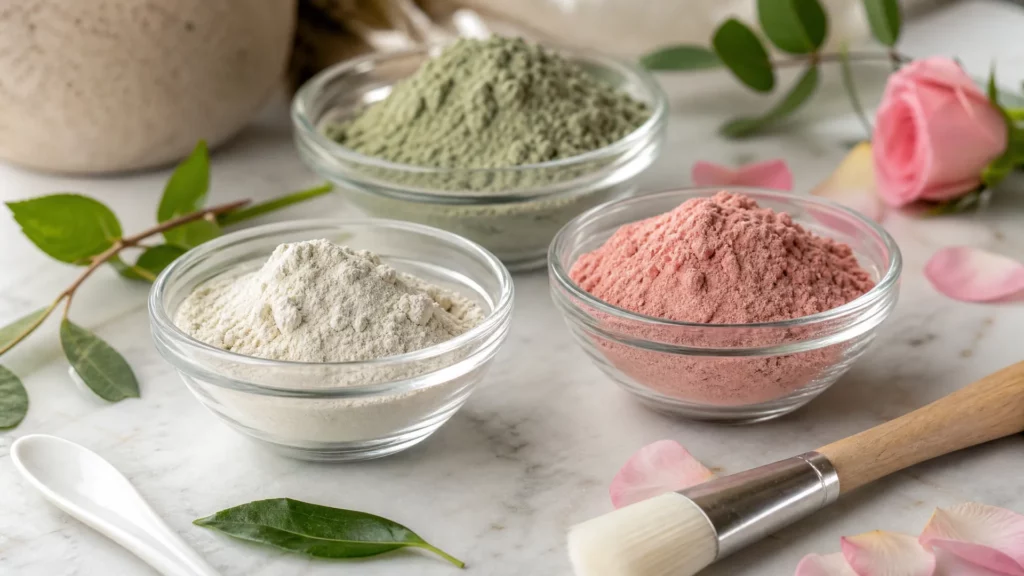
Pink, Green, and Red Kaolin: What’s the Difference?
All three are varieties of kaolin, but their mineral composition, colour, and absorption levels differ enough to matter when you’re formulating. Here’s how to match the right one to your skin concern.
Pink kaolin clay: best for sensitive and dry skin
Pink kaolin gets its colour from a small amount of iron oxide blended into the naturally white kaolin base. This gives it the palest hue and the mildest behaviour. It has the lowest oil-absorption rate of the three, making it suitable for dry, delicate, and sensitive skin types that still want the cleansing and softening benefits of a clay mask without any tightness or irritation.
It’s the clay beginners reach for most often, and rightly so. A basic pink kaolin mask needs only three ingredients, pink kaolin powder, rosewater, and a few drops of jojoba oil, making it one of the most accessible first DIY skincare projects you can tackle.
Green kaolin clay: the detox choice for oily skin
Green kaolin has a noticeably higher mineral iron oxide content than its pink counterpart, which accounts for its deeper colour and stronger drawing action. This makes it better suited to oily or congested skin rather than dry or sensitive types. It absorbs more sebum, unclogs pores more effectively, and gives that satisfying deep-cleanse result that oily skin types are after.
If your skin is prone to congestion, breakouts, or a persistent shine by midday, green kaolin is your clay. Use it in a once-weekly mask and you’ll notice the difference quickly.
Red kaolin clay: richest minerals for dull or combination skin
Red kaolin has the highest iron oxide content of the three, giving it its warm, earthy colour. It has a medium-to-high absorption rate, stronger than pink, milder than some industrial clays, and is particularly useful for reviving dull, tired-looking skin. Its mineral richness makes it a good match for combination skin types and anyone wanting to bring a bit of radiance back to their complexion.
It’s less commonly discussed than the other two, but it’s worth experimenting with, especially when paired with brightening carrier oils like carrot seed carrier oil for skin.
DIY Naturally stocks pink, green, and red kaolin clay, making it straightforward for South African makers to source all three in one place and experiment with different skin-type formulations.
DIY Kaolin Face Mask Recipes to Try at Home
Both recipes below use gram-weight measurements for accuracy. A kitchen scale makes a real difference in DIY skincare, it’s more reliable than volume measurements and helps you reproduce results.
Simple pink kaolin mask for sensitive skin
Makes approximately 30 g (2–3 uses)
- 20 g pink kaolin clay
- 10 g rosewater
- 3–4 drops jojoba oil (about 0.5 g)
Method:
- Spoon the pink kaolin powder into a small glass or ceramic bowl.
- Add the rosewater a little at a time, stirring between additions, until you reach a smooth, spreadable paste. Avoid whisking, this can introduce air bubbles.
- Add the jojoba oil drops and stir gently to incorporate.
- Apply an even layer to clean skin, avoiding the eye area.
- Leave on for 8–10 minutes, then rinse thoroughly with lukewarm water.
Rosewater keeps the formula gentle and hydrating. Jojoba oil conditions the skin during the treatment, so it never feels tight after rinsing. For more on why jojoba works so well here, see jojoba oil in face mask formulations.
Green kaolin detox mask for oily and acne-prone skin
Makes approximately 30 g (2–3 uses)
- 20 g green kaolin clay
- 8 g aloe vera gel (or water)
- 2 g apple cider vinegar (optional, helps balance skin pH)
- 3 drops tea tree essential oil
Method:
- Combine the green kaolin and aloe vera gel in a bowl, stirring until smooth.
- If using, add the apple cider vinegar and mix well.
- Add the tea tree essential oil and stir to distribute evenly.
- Apply to clean skin, focusing on oilier areas like the T-zone.
- Leave on for 10–12 minutes, no longer, especially if your skin is combination.
- Rinse with lukewarm water and follow with a light moisturiser.
Tea tree essential oil is well-regarded in DIY skincare for its use in formulations targeting congested or blemish-prone skin. Keep it at no more than 1% of your total formula, three drops in 30 g is around 0.5%, which is comfortably within safe usage.
How to Customise Your Kaolin Clay Mask
Once you’re comfortable with a basic recipe, add-ins let you tailor the mask to specific concerns. Here’s what works well and at what rough usage rates:
Carrier oils add conditioning and nourishing benefits. Jojoba (a great all-rounder), rosehip (for regenerating and brightening), and marula (for dry or mature skin) all work well at 1–3% of the total formula, roughly 3–9 drops per 30 g batch.
Vitamin E oil at 1–2% of your formula conditions the skin during treatment and acts as an antioxidant stabiliser for any carrier oil in the blend. Even one to two per cent extends the shelf life of oil components and adds a skin-softening benefit. For detailed guidance, see vitamin E oil benefits and safe usage rates.
Liquid activators change the character of the mask. Rosewater is soothing and hydrating. Aloe vera gel is calming and adds slip. Cooled green tea brings antioxidant properties. Apple cider vinegar, used sparingly at around 5–10% of the liquid portion, may help with skin pH balance, though use it cautiously on sensitive skin.
Essential oils should always be kept to 0.5–1% of the total formula for a rinse-off product. Lavender, frankincense, and geranium all pair well with kaolin and suit different skin types.
If you want to extend your routine beyond masks, how to make a natural face cream at home is a natural next step once you’ve mastered clay formulations.
Tips for Using and Storing Your DIY Clay Mask
Always patch test first. Even gentle formulas can cause reactions. Apply a small amount to the inside of your wrist or behind your ear, wait 24 hours, and check before applying to your face.
Don’t leave clay masks on until they crack. The common image of a fully dried clay mask is actually counterproductive, once the clay dries completely, it starts pulling moisture from the skin rather than just drawing out impurities. Aim for 8–12 minutes, while the mask still feels slightly damp.
Frequency matters. For sensitive or dry skin, once a week is plenty. Oily or combination skin types can use a clay mask up to twice a week. More often than that can disrupt your skin barrier over time.
Storage: dry blend vs. wet mask. A dry blend (kaolin powder plus any powdered add-ins) keeps well in an airtight jar for several months, just add your liquid on the day you use it. A pre-mixed wet mask is a different matter: any formula containing water (rosewater, aloe, hydrosols) is a breeding ground for bacteria and mould. A fresh wet mask should be used immediately and any leftovers discarded within 24 hours unless you’ve added a properly dosed broad-spectrum preservative. For a full rundown of your options, see when your DIY mask needs a preservative.
Who should avoid clay masks? Most skin types tolerate kaolin well, but if you have a compromised skin barrier, active eczema, or rosacea-prone skin, check with a dermatologist before adding any clay mask to your routine, even a gentle one.
Ready to get started? DIY Naturally stocks pink kaolin, green kaolin, and red kaolin clay alongside the carrier oils, essential oils, and botanical liquids you need to build out your full DIY face mask kit, all sourced for South African makers who want quality ingredients without the import hassle.
Disclaimer: All recipes and formulas are shared in good faith. DIY Naturally is not liable for any adverse reactions. Always perform a patch test before use, and substitute ingredients if you have known allergies. Use at your own discretion.